Wednesday, February 27, 2013

My Italian Kitchen - Cooking

Last week, we had the kids over for dinner....I always try to plan a dinner that I haven't cooked for them in the past or one of their favorites. Last week, it was "something new" week! I do have to say that dinner turned out great, it was so yummy! Drew and I had it for lunch the next day....neither of us complained! I love to look at recipes but rarely do I follow them. Usually, I just throw stuff together and hope for the best, last week was no different.


Start out by sauteing chopped green peppers and onions in olive oil, salt, pepper and garlic salt (have you noticed that these are my staples?)


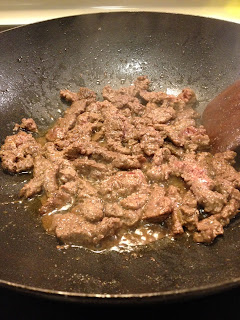
Brown garlic slices, add crumbled sausage and cook until no longer pink


Add peppers and onions to pan with sausage


Now add two cans of diced tomatoes, heat through 


Spoon over pasta, add Parmesan cheese and enjoy

Yup, another successful dinner, out of the cupboard, fridge and freezer! I love when I have everything on hand....my favorite way of cooking! 

The kids will be coming for dinner tomorrow....dinner will be a bit more simple: 
Cheeseburgers without buns
Baked, spiced potato wedges with Ranch Dressing for dipping
Fresh tomatoes and cukes

Simple's good too! 

Stir Fry for Dinner...

We eat a lot of stir fries, it's one of my most favorite dishes to cook! Why...because it cleans out the fridge! I love to pull foods from the fridge, throw them in a wok....voila! Something yummy always comes of it! I'm not a big fan of moose but I'm trying to broaden my horizons! So, I pulled the moose round steak from the freezer, let it thaw, soaked it in water for an hour....the base of tonight's stir fry! Here's how it went:

Moose Stir Fry

Moose Round Steak, sliced
Olive Oil
Salt & Pepper
Garlic Salt
Sugar Snap Peas
Onions, Sliced

Heat wok then add the olive oil, salt, pepper and Garlic Salt. Add sliced moose meat (or beef, if you prefer), brown in wok until cooked through and slightly crispy on the edges. Remove from wok, set aside. In same wok, add more olive oil, sugar snap peas and onions. Stirring continuously, fry until onions are translucent but still slightly crispy. Add moose back into wok, heat through. Serve over Rice or Pasta, if desired.
Couldn't be easier and OMG, couldn't be tastier! I won't say that I love moose meat but I surely don't hate it!


Make sure your wok is very hot before adding meat...


OMG, doesn't this look yummy? It was SO SO good! I love the crunchy snow peas, they add such freshness to the stir fries! 


Sunday, February 24, 2013

I had THE most fun....

For the Bride to Be....I created custom "Tom" shoes for her to wear beneath her wedding dress. I have to admit, I was TERRIFIED to begin! I just had the feeling I would screw up, if I did, I would have to order another pair of Tom's to try again....that could get spendy! So....I worked very slowly, read the words aloud (I printed their song on her shoes) as I wrote them, crossed them off the lyrics sheet as I wrote them....it took me a lot more time to work on them than other projects....just because I was TERRIFIED I would screw up. I didn't! 

I did it, I decorated both shoes, without any crossing out of words, without any smears of paint, without an "redo's"! LOL I showed them to my friends at work, my In-Law's and our best friends...everyone loved them....makes the heart feel good! I have to admit....I would love to make some for me....not wedding themed, of course! Wanna take a look....I'm willing to show them off....would love your feedback! 


The big letters and numbers are done in dark purple with black trim, the song in black and each flower is purple with colored rhinestones for the centers! Oh my, I had such a great time with them! I'm not sure if they are what the Bride wants, or if she likes them...but that's okay! If she doesn't....at least I had the experience of doing something I had not done before. AND.....I know that I want to make some for myself! 

Saturday, February 23, 2013

Practicing Once Again.....

So, I am once again practicing for the wedding.....good thing I have several months to practice as I'm still mastering my technique....not there yet! I can accept that....I will keep practicing until I am where I want to be. I just had an epiphany....I don't have to make cupcakes to practice frosting....I can frost paper! Good thing cause last night I goofed! I was preparing the buttercream frosting for the cupcakes only to realize that I pulled the WRONG recipe...I was making Royal Frosting which dries hard! OMG! So, now I had to pull out the "unsalted" butter for the correct recipe, it needs to sit at room temperature! I did so! Later, I went into the kitchen to start the frosting and holy toledo....I pulled the wrong butter. Now, I'm not one to ignore signs! It was a sign that I was too tired and I should not even try to frost the cupcakes. I decided to just go sit down and watch  the first episode of "Downton Abbey" before bed.

So, this morning, I woke up at 4:45am, thinking it was time to get up. I went into the kitchen to start working on the frosting, got everything out, THEN I looked at the clock! OMG....another sign that I've got too much on my mind! Good grief....I'm beat and wound up all at the same time! I decided that I really needed to be fresh for the frosting! So, I went back to bed, woke up at 6:30! Oh fine! I just got up! I did some housecleaning, dishes, laundry....and finally, it was time to start the frosting. So, the recipe I used did not call for any liquid.....weird! I was a bit terrified that I was going to have a big lump of white sugary substance in my mixing bowl....but no, it turned out beautiful, was so smooth and thick, easy to frost with! Here are a couple samples of what I did this morning:


Right now, I'm not trying to master techniques, I am just testing tips to see what they do! The pictures look blue, they aren't....they are a very dark, stunning purple!


I think this is my fave tip, looks like ribbon.....love it!


I really liked this cupcake with the dark purple flowers on top of the white star bursts....it's stunning in person! 


Oh man, I really love this ribbon tip....I am going to learn to master this one especially....it just makes me happy! 

The frosting recipe I used (found on Pinterest): 

Bakery Style Frosting
1/2 cup unsalted butter, room temperature 
1/2 cup shortening
3-1/2 cups sifted confectioners' sugar
1/2 tsp almond extract (I might try Clear Vanilla next time)

Mix butter and shortening on low, until smooth. Add sugar, 1/2 cup at a time, until blended. Add extract, mix to combine. Increase speed to medium-high and beat for 3 minutes, until smooth. 


Friday, February 22, 2013

How about a Game of Golf?

Today, we celebrated Bev's & Terri's birthdays, both of them love golf and curling! So, the obvious theme would be golf since I know absolutely nothing of curling nor would it be easy to find stamps, stickers or anything curling like that I could use for the cards and gift boxes! We don't have a lot of room in our conference for 12 people, boxes of stuff surrounding the walls, computer stuff and a big conference table with chairs....it's definitely a tight squeeze! Anyhow, I am making do with what I have....can't really decorate the walls or ceiling like I want but I do what I can....so, I spread a green table cloth (grass), wrote golf words all over it, drew two black circles for putting holes (cupcakes with "flags" stuck in them sitting on the black holes). Tracy picked and arranged the flowers, they are gorgeous....yellow, green and white, they matched the decor beautifully! The food was delightful...omigosh, I was stuffed all day: 2 quiches (is that a word), potato casserole (we almost beg Tracy to make this for each birthday...it's too die for), fruit, yogurts, absolutely yummy quinoa, nuts and I think raisins, roasted coconut and granola fresh from Hawaii (I mean fresh.....my boss just returned yesterday morning from Hawaii) and these most awesome "golf balls" date balls that Gail made....they looked like golf balls (powdered sugar)...OMG, I am still stuffed! I made cupcakes....would you expect anything else? I had a great time with this theme, I would have liked more time to create better decor but it still turned out great....I created two golf birthday cards and two golf gift boxes...altogether the decor looked awesome! I'm sure ya'll want to see....
So, here is the table....you can see how it all comes together with the cupcakes, the present boxes, cards and a glimpse of the flowers in the background. 


These are the birthday cards, the one on the right is upside down (I just noticed), LOL! Oops! Anyhow, you get the idea. I didn't have any golf stamps, had to use stickers (not my favorite way of crafting cards). I think they turned out cool anyhow!

A closer view....the cupcakes....well, you can see the sand traps were made with crushed graham crackers, also you can see the water hazard, rough greens and the putting greens...miniature flags and edible golf balls completed the picture! Oh, we had REAL golf balls hanging around on the table as well....if you look close, you can see the black cupcake with the flag stuck in it and the golf ball next to it....a putting hole? 

Obviously, I'm pretty proud of these cupcakes! LOL We keep getting closer and closer to check out the detail! Oh, besides fun to make, they were fun to eat! Yum!

Final shot....I won't bore you anymore....the water hazard...who's gonna wade in and get all those golf balls? 
See, I'm getting better at frosting....just keep practicing! 

Thursday, February 21, 2013

Practice makes Perfect.....Right?

So, I'm practicing making cupcakes and frosting them for my son's wedding. The colors are purple, black and white....the bride and groom wants both white and chocolate cupcakes with a buttercream frosting. Each month on our Playday (my husband and I host Playday with our best friends as well as our son and his fiance)...for Playday, I'm creating cupcakes to taste test for the wedding. Each month I'm making a different flavor of cupcake and a different flavor of frosting. Did I tell you....I'm teaching myself to frost cupcakes, using different designs. Well, I can definitely see improvement each month.....it's not like all I'm doing is trying different techniques every night (I'm not a pro....yet, LOL)....I'm only working on them one night a month, however, I do plan on working on roses this week....I'm really excited to be working on these! Cross your fingers! I will post pics!
So, here is my first ever frosting of cupcakes:


I just pulled out tips and played. I tried a bit of everything. I suppose I should buy or look up some frosting techniques to help me out but I don't usually work that way...I usually just jump in head first and this is no exception! My first try! 

So, the next month I made Sparkling Cider cupcakes with Sparkling Cider frosting. The cupcakes were a hit, the frosting wasn't (it was good, just not too die for good)! But, they looked pretty! LOL Sticking with the purple, I tried my hand at flowers (the roses were pre-made, can't take credit for them). I posted in an earlier post the design choice from this session of cupcake making. I just want to show you my second attempt....here it is: 


I had a great time with the flowers, can't wait to practice more. I'm sure everyone is going to be tired of cupcakes by year end, but hey, I'm having fun! I don't want to make this post too long, don't want to bore anyone so I will post my third try another time. The third attempt was for Valentine's Day.....guess what: they are not purple! LOL


Wednesday, February 20, 2013

He's a Mean One....

So, every year, Leslie, Renee' and I have been decorating the foyer for our office! This year (2012) was no different! I should tell you...we started planning this immediately following the 2011 Christmas! Or shortly thereafter! So anyhow, we chose....The Grinch! I have to say...this was the most fun to create for, but then it's one of my fave Christmas flicks! I watch the Jim Carrey version at least three times each season! So, I put together some Grinch Ornaments: glass and tin...we grabbed some ribbon, ball ornaments, a cute little tree, my son's adorable dog (called Max for the Holidays) and of course, the man himself....The Grinch! Oh, the compliments we received for this tree stealing green man! It was absolutely adorable! These pictures do not do him justice:


Look at that guy....he has buried himself in the tree....we were sure that one morning we would arrive to work and the tree would be gone! Little Bugger! 
Okay, so we are done with Christmas for this year. But hey, we have 2013 already planned for. There is a pile of decorations under my desk, just waiting to bring smiles to faces. A hint for 2013 Christmas.....Yummy! 
Happy two months after Christmas! 

The Grinch! 
You're a mean one, Mr. Grinch
You really are a heel, 
You're as cuddly as a cactus, you're as charming as an eel, Mr. Grinch, 
You're a bad banana with greasy black peel! 

You're a monster, Mr. Grinch, 
Your heart's an empty hole, 
Your brain is full of spiders, you have garlic in your soul, Mr. Grinch, 
I wouldn't touch you with a thirty-nine-and-a-half foot pole! 

You're a foul one, Mr. Grinch, 
You have termites in your smile, 
You have all the tender sweetness of a seasick crocodile, Mr. Grinch, 
Given a choice between the two of you, I'd take the seasick crocodile! 

You're a rotter, Mr. Grinch, 
You're the king of sinful sots, 
Your heart's a dead tomato splotched with moldy purple spots, Mr. Grinch, 
You're a three decker sauerkraut and toadstool sandwich with arsenic sauce!

You nauseate me, Mr. Grinch, 
With a nauseous super "naus"!, 
You're a crooked dirty jockey and you drive a crooked hoss, Mr. Grinch, 
Your soul is an appalling dump heap overflowing with the most disgraceful 
Assortment of rubbish imaginable mangled up in tangled up knots!

You're a foul one, Mr. Grinch, 
You're a nasty wasty skunk, 
Your heart is full of unwashed socks, your soul is full of gunk, Mr. Grinch, 
The three words that best describe you are as follows, and I quote, 
"Stink, Stank, Stunk"!


Tuesday, February 19, 2013

Cleaning as I Go!

So, I have this friend (don't you like how stories start off like that?), who used to make cookies with me. We haven't seen each other in quite awhile...rather, for a VERY long time and yet, we live in the same town. We both have our own lives, I guess! Anyhow, this friend, you know who you are...Tracie, and I were making sugar cookies one day for Christmas. I have THE best sugar cookie recipe (my husband's favorite at least)! I will share later in the post! Sorry, I got side-tracked....anyhow, this friend and I were making cookies in my kitchen. As she was pouring the flour into the mixer, I was wiping up the spilled flour and putting the jar away. After she poured the sugar into the mixer, I wiped down the counter and put the jar away. Same goes for the vanilla, eggs, salt, etc.....Finally, I guess it got to her! She smacked me with a towel and said, "Alright already! Stop cleaning! Clean when we are done, you are driving me nuts"! So, I didn't get it....I didn't realize what I was doing, it's just how I cook and bake, I clean as I go! I hate messes! Anyhow, I was making cupcakes from scratch this weekend and realized, by darn, she was right! It took me longer to make the cupcakes because I was wiping the counter after using each ingredient instead of when I was all done! But hey, if you came knocking on my door whilst I was making cupcakes, I would let you in and not apologize for the mess....well, because there wasn't one! Did I scare her away from playing in the kitchen with me?  I guess I would be what one calls anal! I won't even tell you the story of my Sister's visit and the throw pillows on the couch! Well...I will tell you a little so you won't feel I was holding out on you....imagine pillows with lines sitting horizontally, Sister placing them on the floor and laying down, Me picking them up and laying them horizontally again each time she got up to go say...to the kitchen, to the bathroom! Let's just say....I drove her nuts! Good thing my husband is slight anal as well, he picks the pillows up and places them horizontally as well!

Oh, I need to get back to the Sugar Cookies...I think you might just want the recipe! I don't know where it came from, it's called Ethel's Sugar Cookies but I got the recipe from my Mother in Law, her name is not Ethel and neither was her Mother's name Ethel! Ethel, whoever you are....we love your sugar cookies!

Ethel's Sugar Cookies
Ingredients:
3/4 c Shortening (I use Crisco Butter Flavored)
1 c  Granulated Sugar
2 Eggs (my son asks me to use fake eggs so he can eat the dough, his favorite)
1/2 tsp Vanilla
2-1/2 c Flour
1 tsp Salt
1 tsp Baking Powder

Directions:
Preheat oven to 400 degrees. Mix shortening, sugar, eggs and vanilla in mixer. Stir in baking powder and salt, slowly add flour. Chill as least one hour. Roll out to 1/8 inch thick, cut into desired shapes. Place on ungreased baking sheet, bake until golden for 6 to 8 minutes.

Easy Creamy Sugar Cookie Frosting
Ingredients:
1 c sifted Confectioners Sugar
1/4 tsp Salt
1/2 tsp Vanilla
Water (add 1 tbsp at a time)
Food Coloring (add until desired color is acquired)

Directions: 
Mix all ingredients until desired thickness using whisk. Add food coloring, frost cookies. Let "dry" for several hours. Frosting will be hard on top and creamy on below.

So, ya'll wanna SEE the cookies? Check these out:
Once again....Thanks Ethel for making me the cleaning Sugar Cookie Queen! LOLOL

Monday, February 18, 2013

Sparkling Cider and Cupcakes

So, my first attempt at cupcakes for my son's wedding...I found a recipe that used Sparkling Cider. The cupcakes were a huge hit (a 4 out of a 5), the frosting, not so much! The frosting was a bit runny, didn't seem to set well. I did use it to pipe frosting and because I am new to all this, I didn't know that it wasn't up to piping par! Here are a couple of pictures....I didn't think to take pics of the "before frosting"....


Oh, by the way....the wedding colors are purple, black and white! My son and I moved the roses (Wilton's Gum Paste roses) around until we got the design that both my son and his future bride are happy with!


I will be teaching myself to create Royal Icing Roses (another post). Because I can't find dark purple roses, I have to learn to make my own (and they will taste a whole heck of a lot better than gum paste which tastes like....sugared chalk)...The dark purple of the smaller flowers is the color I'm striving for even if everyone gets purple mouths! I'm having fun.....that's the coolest thing!


Cupcakes and Chocolate....

So, I haven't told ya'll that I'm making the cupcake/cake tower for my son's wedding....I'm so excited! I am having the time of my life creating cupcakes for taste testing. The first cupcakes I made were Sparkling Cider (a hit) with Sparkling Cider Frosting (not a hit, too runny)....Oh, did I tell you, I have never really frosted cupcakes before other than the standard spread the prepared frosting on cupcakes and pour sprinkles on them....you will watch me grow with my frosting techniques. Anyhow, going back to the chocolate (I did try to entice you to read through the title)! Okay....so first I will post the recipe (it's VERY chocolate) that I used and make notes of how I tweaked it and then I will show pics (stop drooling)!

Chocolate Cupcakes

Ingredients: 
1-1/2 cups cocoa powder
3 cups all purpose flour
3 cups granulated sugar
1 tbsp baking soda
1-1/2 tsp baking powder
1 tsp salt
3 eggs (bring to room temperature)
1-1/2 cups buttermilk (***)
1-1/2 cups water
3/4 cup vegetable oil
1/4 cup Hershey's Special Dark syrup
2 tsp really good vanilla extract

Directions:
Preheat oven to 350 degrees, line muffin tin with paper liners or spray with cooking spray (I prefer the liners). Sift together the cocoa powder, flour, baking soda and baking powder (I sift all dry ingredients so there won't be any lumps). Mix in the sugar and salt. Slowly add the eggs (one at a time), the vanilla, water, oil and buttermilk. Mix until combined (scraping the sides and bottom to reach all the dry ingredients). Fill liners to about 2/3rds full, using a 1/3 cup measuring cup works well and keeps the mess down. Bake for 20 minutes, remove from pans to cool on wire racks. This recipe made 36 fluffy, very chocolatey cupcakes.

(***) - If you don't have buttermilk, you can make it by pouring 2 tbsp lemon juice into a 1-1/2 cup measuring cup and filling it the rest of the way with milk. Let sit for 15 minutes, it will get curdled and look yucky but works so well! I always make it this way....I actually like the texture of the recipe better.


This is what was left after 24 cupcakes....Yum! I could have just taken a spoon to it but I knew I needed to make that other dozen! 
I used a 1/3 cup measuring cup to fill the cupcake liners...


This is what they look like....YUMMY! Can you imagine just biting into one? I usually fill the liners with a little less batter but I wanted them to over hang a bit! I am compromising by  not having  "too much frosting"   as we don't want them overly sweet, but yet have enough to make them pretty. The bride doesn't care for frosting so much and the groom (my son), well like me, he loves frosting! It's  Monday, I will be frosting on Thursday so you will just have to wait for those pictures....We'll see how these go over. Wanna try one? 

Yippee Kai-yay........

Happy Birthday Renee' (last summer)..... I always try to pick a theme for my friend's birthdays! Renee' is our Cowgirl....and what cowgirl doesn't like a good stud? Okay....we're talking about horses now! Yeah Right! So, for Renee's birthday, the office girls all dressed in western garb, complete with cowgirl boots!


We had a yummy lunch, everyone brought in "food from the ranch"! Cowgirl Beans, Corn on the Cob, Mashed Potatoes, Pulled Pork, Meatballs and lots of gravy....because what Cowgirl doesn't eat gravy slathered on everything?
For Renee', I created a "Stud Ranch" canvas for her cabin wall and of course, I had to make her card with a "Stud in the Making"....a little baby stud (this photo is from my phone and won't allow me to turn it...sorry)!
Birthday gift of an old pot with an old spice cookbook and old spices! Add to that, checkered tablecloth, summer flowers, bandanna, cast iron pan candle, a "Stud Ranch" canvas and "Stud in the Making" card.....made for a great cowgirl party! Yippee Kai-yay!

What fun we had......our inner cowgirls had a blast! 

Sunday, February 17, 2013

I'd Like to Start by Saying.....

Welcome to my Party!

At the encouragement of a friend of mine, Leslie, I have created a blog to capture all my party ideas, party planning, party pictures, party decor, party cards....party anything. At first I was reluctant...I mean, what do I know about planning parties and would anyone really be interested in what I have to say? I do have to say that I've spent many a night, sleepless, because my mind won't shut down, I can't stop thinking about ways to decorate, what to create, how to make the party decor fun, what to cook (I do love planning the food) and how to make the parties exciting. Oh, I don't get into the games, I'll leave that to ya'll! It's silly, but I don't even really like going to parties, again, I will leave that to ya'll! I just like the act of designing, creating, cooking, planning the party.

On this blog, I plan to post pictures of parties I've done, things I've created for parties and recipes....lots and lots of recipes.

It may be slow going as I don't do many parties but I will also show you the steps I've taken to plan for my son's wedding, work birthdays.....testing of cupcake recipes and decorating (by the by, I am new to decorating cakes and cupcakes but I am learning. I will show you my first effort of frosting cupcakes, then I will show you as I progress! I am going to learn how to make Royal Frosting Roses, you will watch me as I learn....yes, it will take a great deal of humility on my part, to show you my failures!

I'm going to start you off with an Angry Bird Card and gift box for Tracy's birthday.....
I will post more pics each day....I just wanted to get the "Party Started"!